
Making the Wukong Costume Parts and Staff
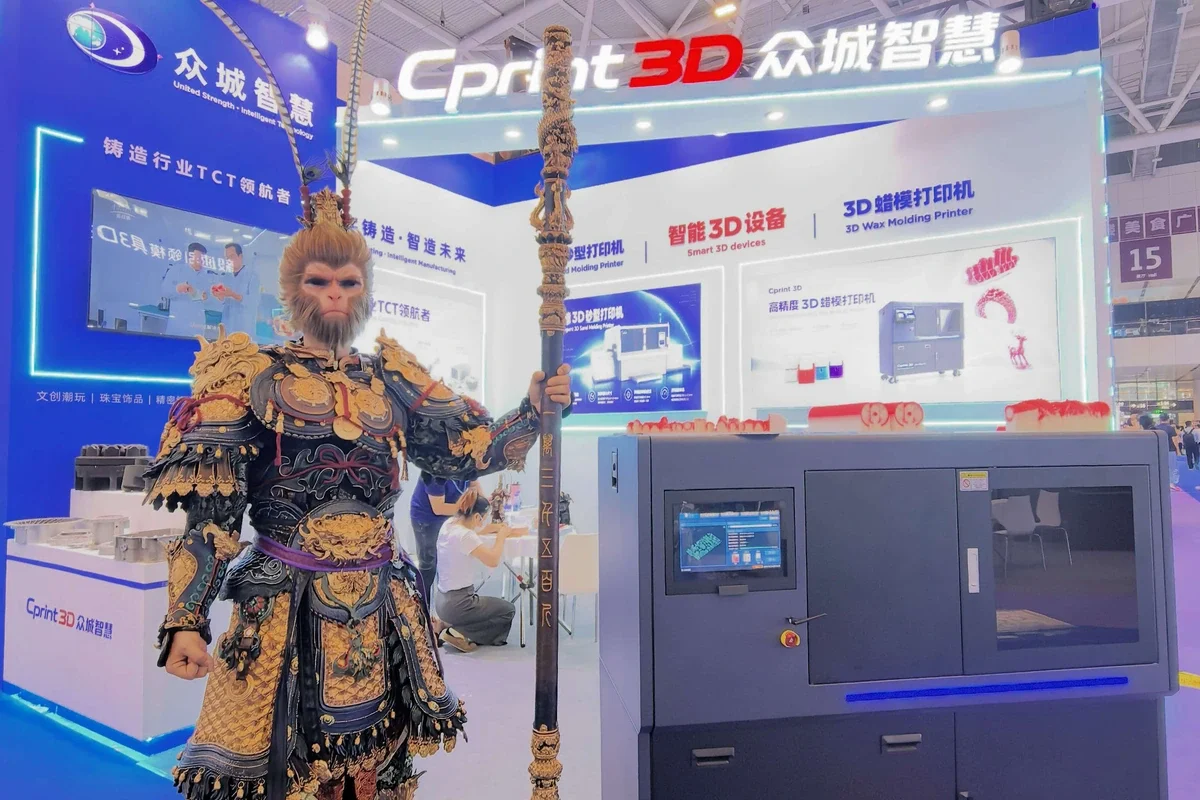
At TCT Shenzhen, many visitors stopped for photos with the Black Myth: Wukong character at the Cprint 3D booth. The armor decorations and the staff were key features of the costume.
We made most of the costume parts, along with the staff, using wax 3D printing and casting. First we print the wax models, then use them to make casting molds and pour the metal. The parts are finished and assembled for the display. Metal components for figurines can be made with the same process.
How are the dense dragon motifs and scales on the staff made? What do the full-size prop parts and small figurine accessories look like before printing? These production images help explain the process.
Arranging the Models in Wukong Software
Once the models are ready, we use our Wukong layout software to prepare the print job. This is where we arrange their orientation and position on the build platform.
In the screenshot below, the larger model is a decorative section of the full-size staff. The two long, slender models beside it are small staffs for figurines. They serve different uses and differ in both size and structure.
We position each model according to its shape and dimensions, then complete slicing and the other print preparations. The 3D models already contain the dragon motifs, scales and decorations at the ends.

Printing the Dragon Motifs and Scales
The decorations at the ends of the staff are much more complex than its shaft. Dragon forms, scales and scrolling patterns share the same component. Some sit close to the surface, others project outward, with grooves of different depths between them.
These details have to be modeled first. The height of each raised pattern, the thickness of the scales and the gaps between neighboring decorations all need to be defined in the geometry.
During printing, the 3H-420 Plus MJP wax 3D printer builds the wax model layer by layer from the model data. Build wax forms the part itself, while support wax holds the areas that need support. Once printing is complete and the support is removed, the wax model already has the raised details.
At this stage, the patterns can be checked for completeness and any details that have merged together before casting is arranged. This inspection matters for heavily decorated parts such as the staff sections.

Turning the Red Wax Model into a Metal Part
The image below shows the red wax model of a large staff section on the left and the corresponding casting on the right. The positions of the dragon forms, the rows of scales and the surrounding scrollwork can be matched between them.
This is why printed wax models are useful for these pieces: the complex shape is made in wax first, then reproduced in metal through casting.

The basic process of lost-wax casting starts with making a refractory mold around the wax pattern. The wax is then removed, leaving a cavity where it used to be. Molten metal is poured into that cavity and cools to form a casting of the corresponding shape.
The casting still needs cleaning and removal of the runners, followed by finishing and surface treatment to suit the finished piece, and finally assembly. The shape is established in the digital model and wax stages; color, sheen and similar effects depend on the later treatments.
The staff seen at the show is therefore the result of wax printing, casting and subsequent processing. The 3D printer handles the wax-model stage.
The Same Process Works for Small Metal Figurine Parts
Alongside the full-size staff, we also prepared small staff models for figurines. Their shape is visible in the earlier layout screenshot: a slender shaft with decorated ends.
For small accessories like these, proportions, pattern spacing and part thickness need to be checked at the figurine’s actual size. Connections to other parts also need to be considered in advance so the pieces can be cast and assembled.
The complete Wukong figurine has detailed chest plates, waist decorations, skirt armor and leg guards. Components that need to be made in metal can be produced as wax models first, then cast, finished and assembled.
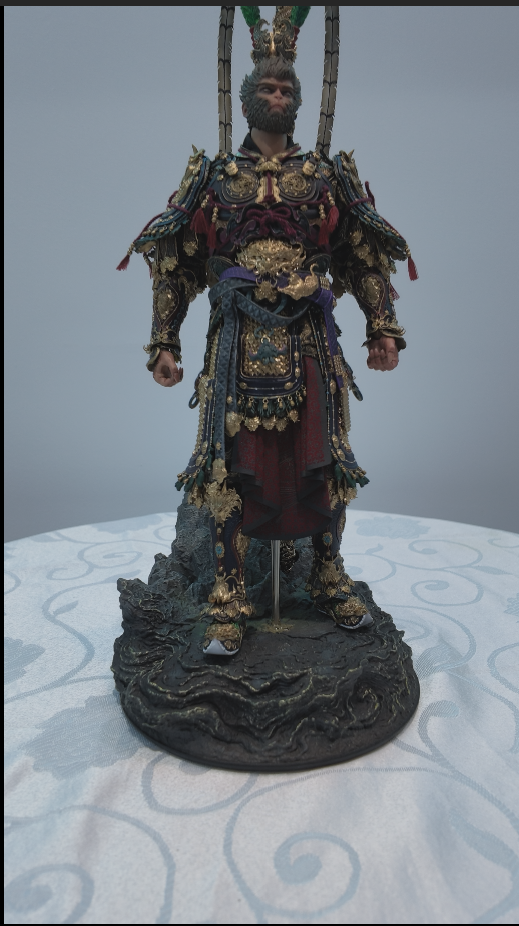
If an accessory needs further changes, the 3D model can be revised and a new wax model printed for inspection. The size of the decorations at the staff ends and the depth of the patterns, for example, can be compared before the design is finalized and production continues.
For prop and figurine studios, this offers a way to make complex metal accessories. If you have a similar part in mind, send Cprint 3D your model file, finished dimensions, quantity and preferred material. We can work through the wax printing and casting plan with you.